Why would you create an external group?
There are several reasons:
- You want an easy way to email a group of people internally and externally—for example, commissioners. You could use a tool like Groups.io, Discord, Mailman, or others. But you already have Google. Plus, tools like Groups.io have a cost, and emails often end up in spam folders.
- Perhaps you are the Committee Chair and want to easily communicate with other committee members without logging into a portal to respond (I’m talking about TroopWebHost here).
- Maybe you want a parent group so you can send emails to all the parents, and they can easily respond.
Really, any reason where you want an easy way to email a group of people—outside, inside, or a combination of both—without a lot of overhead.
Before we do anything, let’s talk about security in Google Groups—or, at the time of this posting, the lack of it.
In Google Groups, there are only three levels of membership:
- Members: Basic participants. They can read and post messages depending on permissions but cannot manage the group.
- Managers: Almost identical to owners but cannot delete the group or change ownership. They’re ideal for day-to-day moderation and administration.
- Owners: Have full control, including deleting the group, changing settings, and assigning roles. Because of their power, Google recommends limiting the number of owners.
Before you begin, you need to figure out your level of trust. Do you trust your admins not to do anything harmful? Or do you allow members to add and remove members? That’s your choice if you, as an admin, don’t want to manage users. Personally, I believe in the lowest level of trust—that’s just the IT admin in me.
Why is this important?
One simple reason: you don’t want people outside your organization to add or remove users. Nor do you want someone to accidentally edit the group—or worse, hack an account and access those emails (though by that point, there are bigger problems).
One positive note:
With the settings I recommend here, only people within the organization can add or remove members. This limits their ability to make any further changes to the group.nly people within the organization can actually add or remove members as a member. This limits their ability to make any further changes to the group.
Let’s get started
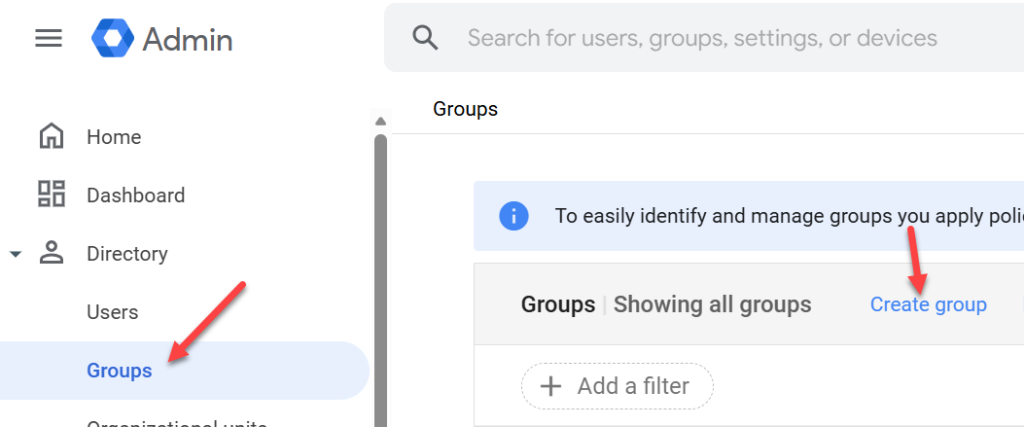
- In Google Group admin go to Groups
- Create a new Group
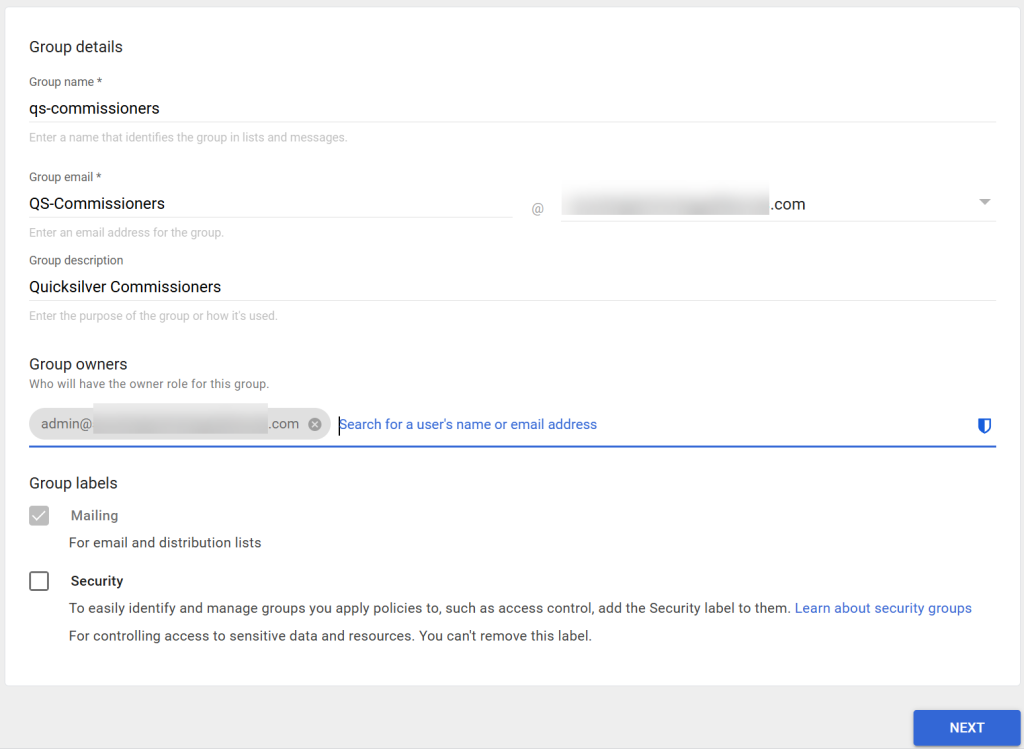
- Create the group as you normally would
- A name, email address, description
- Assign it a single owner. In this case it is the District Executive. This will make sense in a latter step
- Set the group labels to Mailing only
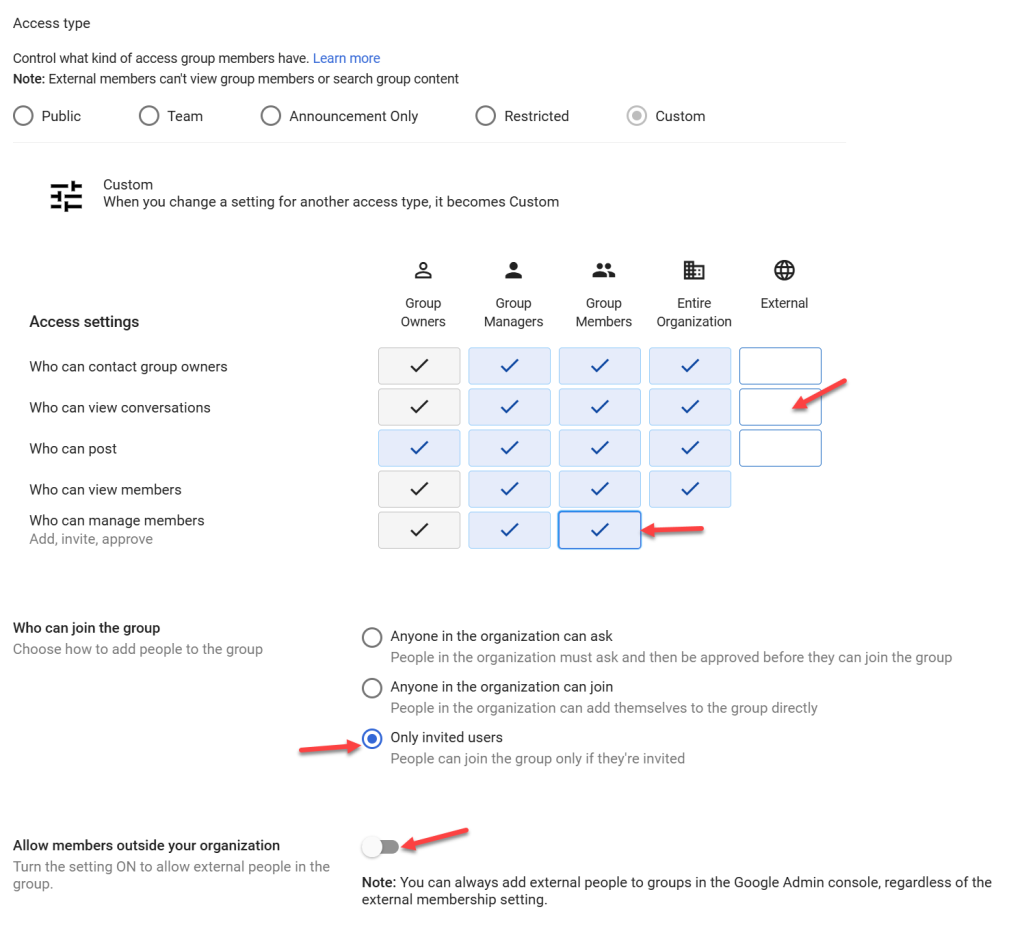
- At the settings page
- Uncheck the Who can contact account owners for External. All external boxes should be unchecked.
- Check the box for Members can manage members. This means anybody inside the organization can can manage members. But it also means that being a member won’t allow you to change settings in the group itself. But of disabling the uncheck all members, external members cannot access group settings at all.
- Set the option for who can join to Only invited members.
- Uncheck All members outside your organization to disabled. This means that nobody outside the organization, except for invited members can be part of the group. So only somebody within the organization can add a member directly. This also means that nobody outside the organization can see group history. Which is fine because it should be in their email
- Click Create Group
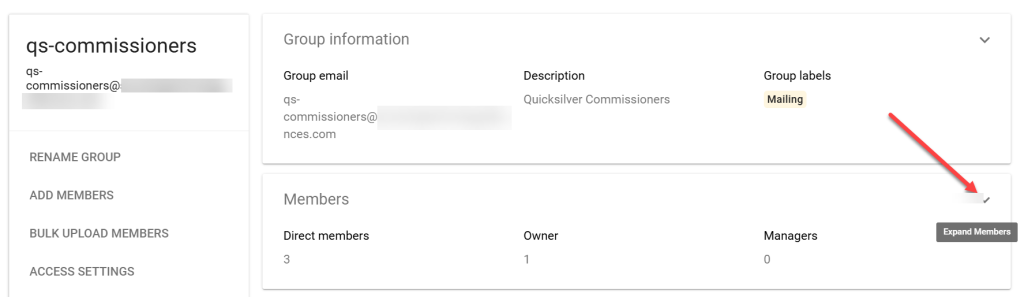
- We will add our first member. For example the District Executive.
- Once you finish setting up the group, this person will be able to add and remove members of the group, without making any changes to settings.
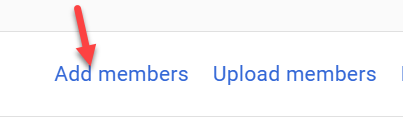
- Click Add members
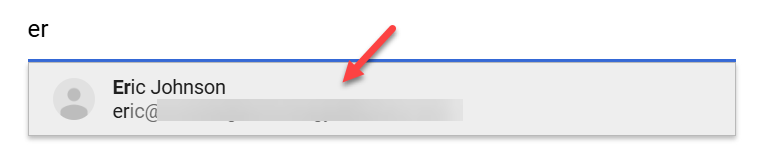
- Start typing the name of the user
- when the bar shows the name has been resolved click on it

- You can add more users.
- However, the object is to get to the point where a manager can add users, not the admin
- Wait a couple of seconds and then refresh the page the new user will show up.
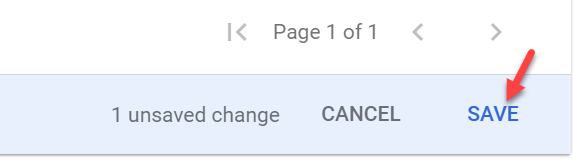
- Don’t forget to Save the settings

- There are a few other basic settings to do:
- Change the default reply to
- Add a prepend to the Subject
- Add an optional footer
- Go to https://groups.google.com as an owner of the group
- Go to all Groups and click on the Group name
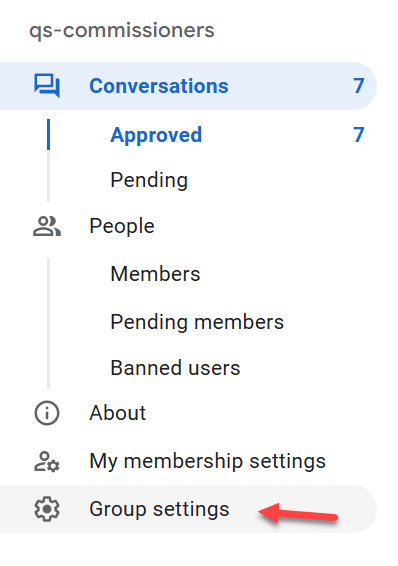
- Go down to group Settings
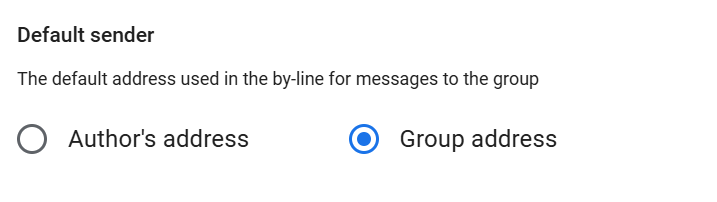
- Set the Default Sender to either the Author or the Group. A person can always do a Reply All and then delete the Group address.
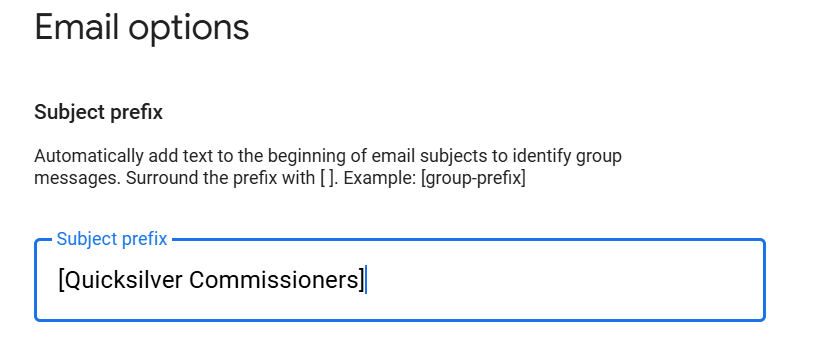
- Under Email options, add a prefix
- This will this will be added to the beginning of the Subject
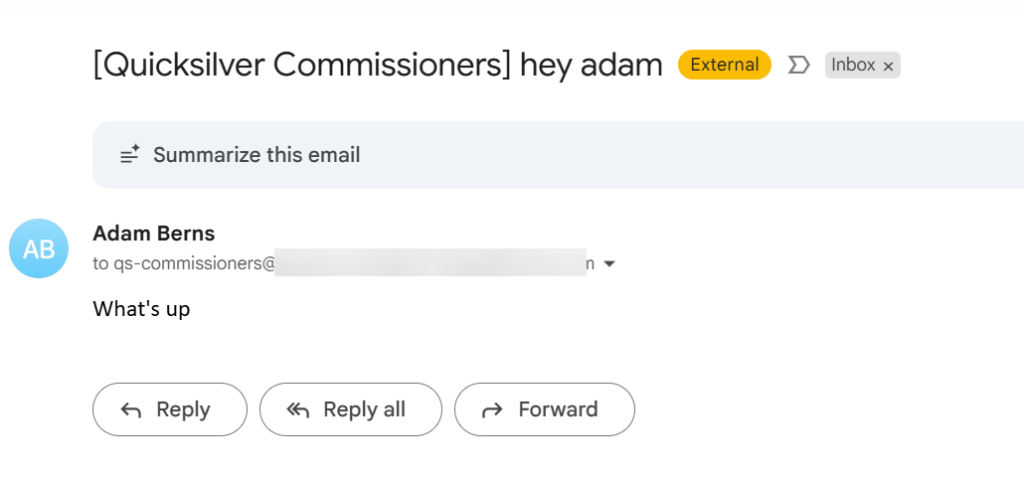
- For example [Quicksilver Commissioners]
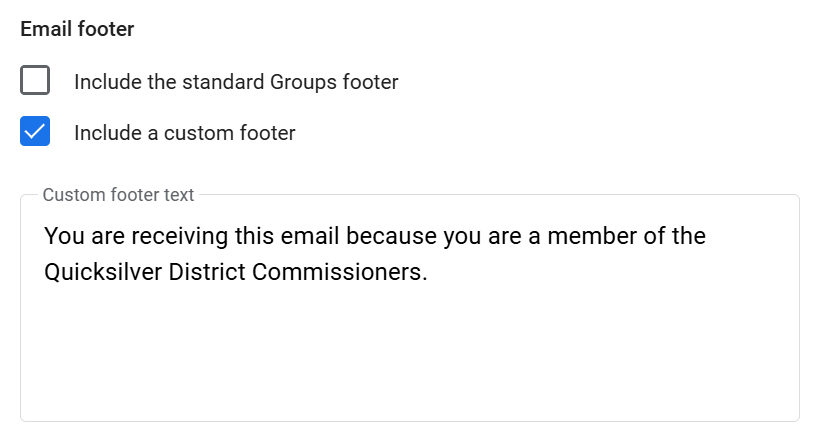
- Add an email footer. Though not required, it does give you the option to add details.

- Finally Save the changes
- The Admin(s) can now add and remove members, but no other changes to the group.
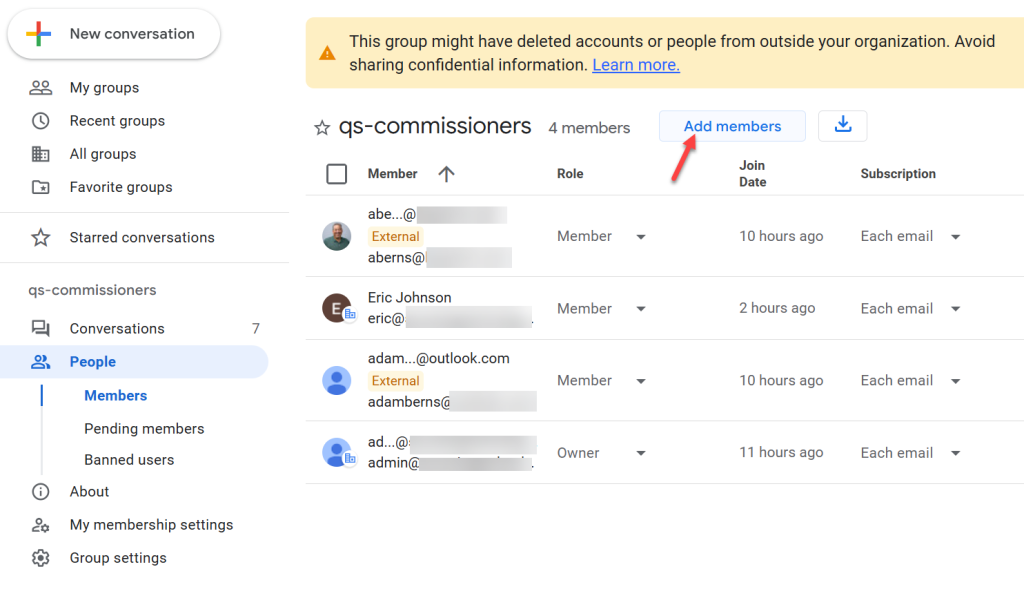
Organization User View into the group
- Logging in as an internal member (Eric Johnson), I can add a user.
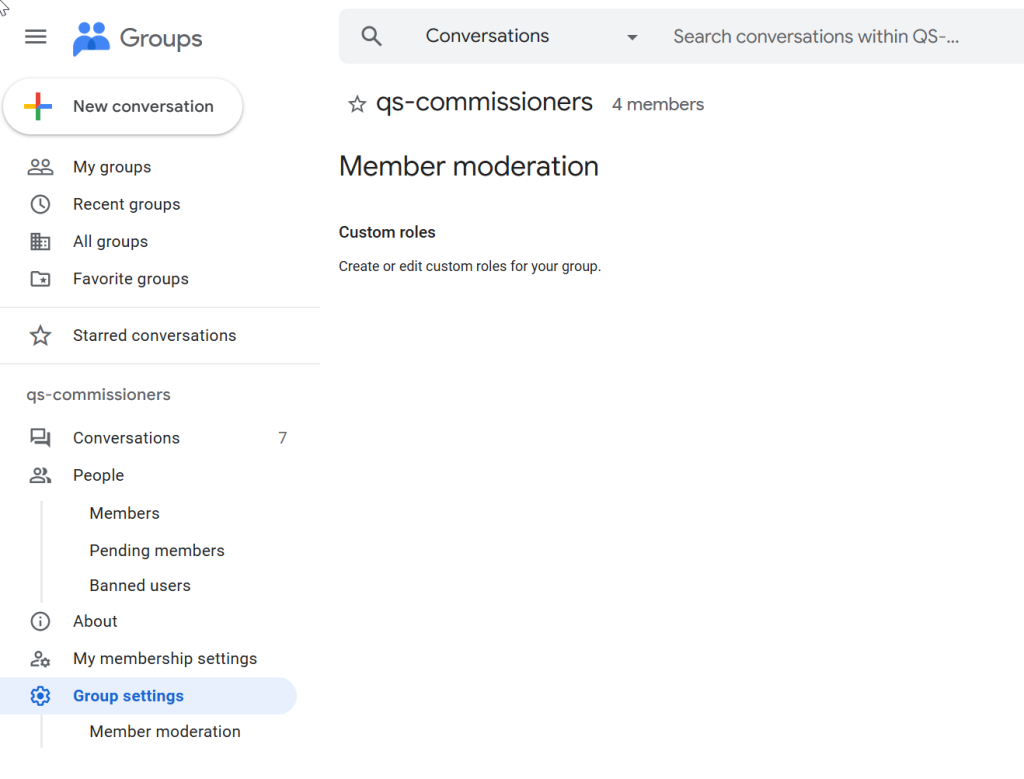
- And under Settings there is no settings to be made.
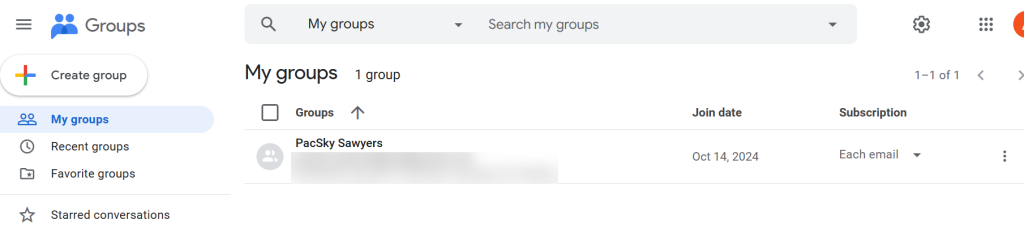
Logging in as an external user.
- If I log into Google groups as an external user who is a member of the group I do not see the group at all.
- That’s it.
- When somebody sends an email to the group they will get an email that has the [Quicksilver District] in the subject, regardless of what they typed.
- Depending on the admin settings, a reply will either reply to the sender or to the group.
Some gotchas on this, sadly they are Outlook based.
- By having the setting in the group apply to list, when replying in Outlook, the Reply All will only reply to the group. While in Google reply all will reply to the group and the sender.
- In Outlook, the [] characters are not shown in the subject, what’s between them is. And the toast (these are the popups you get for reminders or new emails) will show the []. In Gmail, this works as expected.